- Joined
- Nov 19, 2014
- Messages
- 109
- Reaction score
- 68
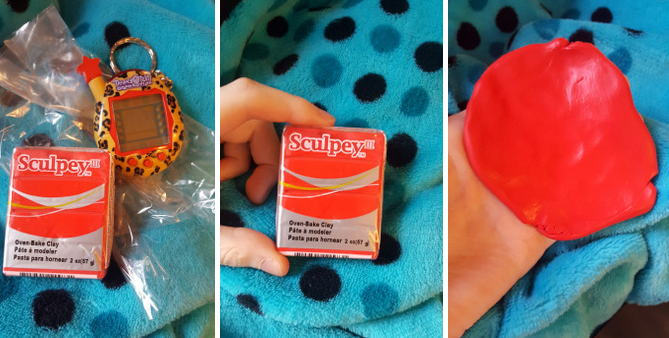
Supplies:

To begin, gather up all your supplies. I used what I could find laying around my house. That being: Sculpey III, a V4.5, and a plastic sandwich bag. Sculpey can be hard to deal with, you will need to kneed it quite a bit.

First! You’ll need to mold your clay into a ball, I used quite a bit so I could rest larger v-pets in it if I wanted to later.
After its been molded into a ball, you’ll then lay your plastic piece over the sphere and gently press your v-pet into it. From here, you can mold the back, front, sides, or any combination of those for some added support if you’d like.
Next, you’ll take off the v-pet along with the plastic wrap and smooth out any wrinkles, dents, scratches- whatever ya got- until it’s smooth again. Pop your v-pet in again to make sure you like how it fits still.

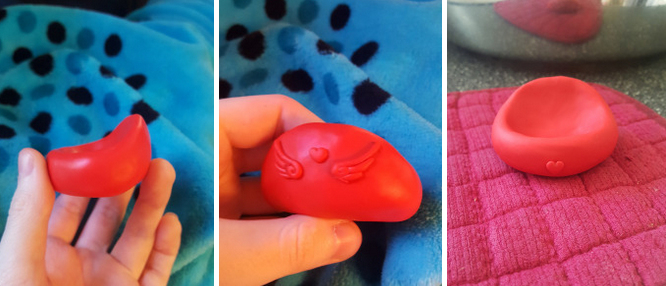
You’ll want to make sure the bottom is flat, so it won’t roll around or wiggle, you want it to be sturdy!
From here, you can add any extra clay details, I added some little wings and hearts to mine 。・:*:・゚★,。・:*:・゚☆
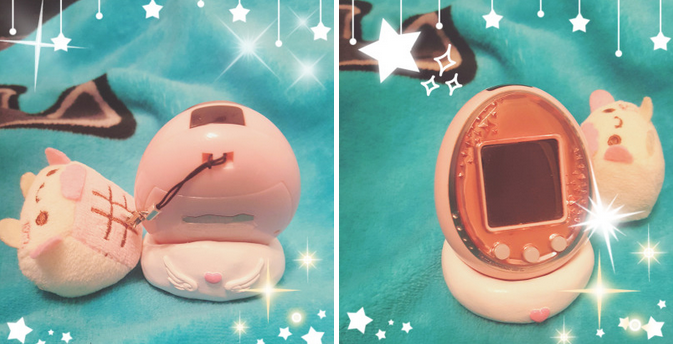
Finally, pop it in the oven or let it dry! Once it’s cooled and/or hardened you can get to painting it and adding on charms, paints, gems and any other sort of detail you wish.
AAAAND all done!!
Tips and tricks:
~ Miau
- clay of your choice
- V-pet of your choice
- Plastic bag or cling wrap
- paints, gems, charms, ect. (optional)
To begin, gather up all your supplies. I used what I could find laying around my house. That being: Sculpey III, a V4.5, and a plastic sandwich bag. Sculpey can be hard to deal with, you will need to kneed it quite a bit.
First! You’ll need to mold your clay into a ball, I used quite a bit so I could rest larger v-pets in it if I wanted to later.
After its been molded into a ball, you’ll then lay your plastic piece over the sphere and gently press your v-pet into it. From here, you can mold the back, front, sides, or any combination of those for some added support if you’d like.
Next, you’ll take off the v-pet along with the plastic wrap and smooth out any wrinkles, dents, scratches- whatever ya got- until it’s smooth again. Pop your v-pet in again to make sure you like how it fits still.
You’ll want to make sure the bottom is flat, so it won’t roll around or wiggle, you want it to be sturdy!
From here, you can add any extra clay details, I added some little wings and hearts to mine 。・:*:・゚★,。・:*:・゚☆
Finally, pop it in the oven or let it dry! Once it’s cooled and/or hardened you can get to painting it and adding on charms, paints, gems and any other sort of detail you wish.
AAAAND all done!!
Tips and tricks:
- Sculpey and most baked clays like Fimo can get pretty heavy, putting a felt piece under it might help so you don’t scratch furniture!
- “kids clays” like crayola model magic are cheap, light, and come in lots of colors, but aren’t as durable.
- if you decide to paint your cradle, put down a white primer. Especially on darker colored clays. it also might be a good idea to use a spray varnish to prevent chipping or flaking.
- Be creative! This tutorial can serve as a simple base to many other fun designs!
~ Miau
Last edited by a moderator:

")